Skip to product information
1 of 8

Customized Champagne Wall

Customized Champagne Wall

Regular price $560.00 USD
Regular price Sale price $560.00 USD
Sale Sold out
Shipping calculated at checkout.
Personalization
Quantity

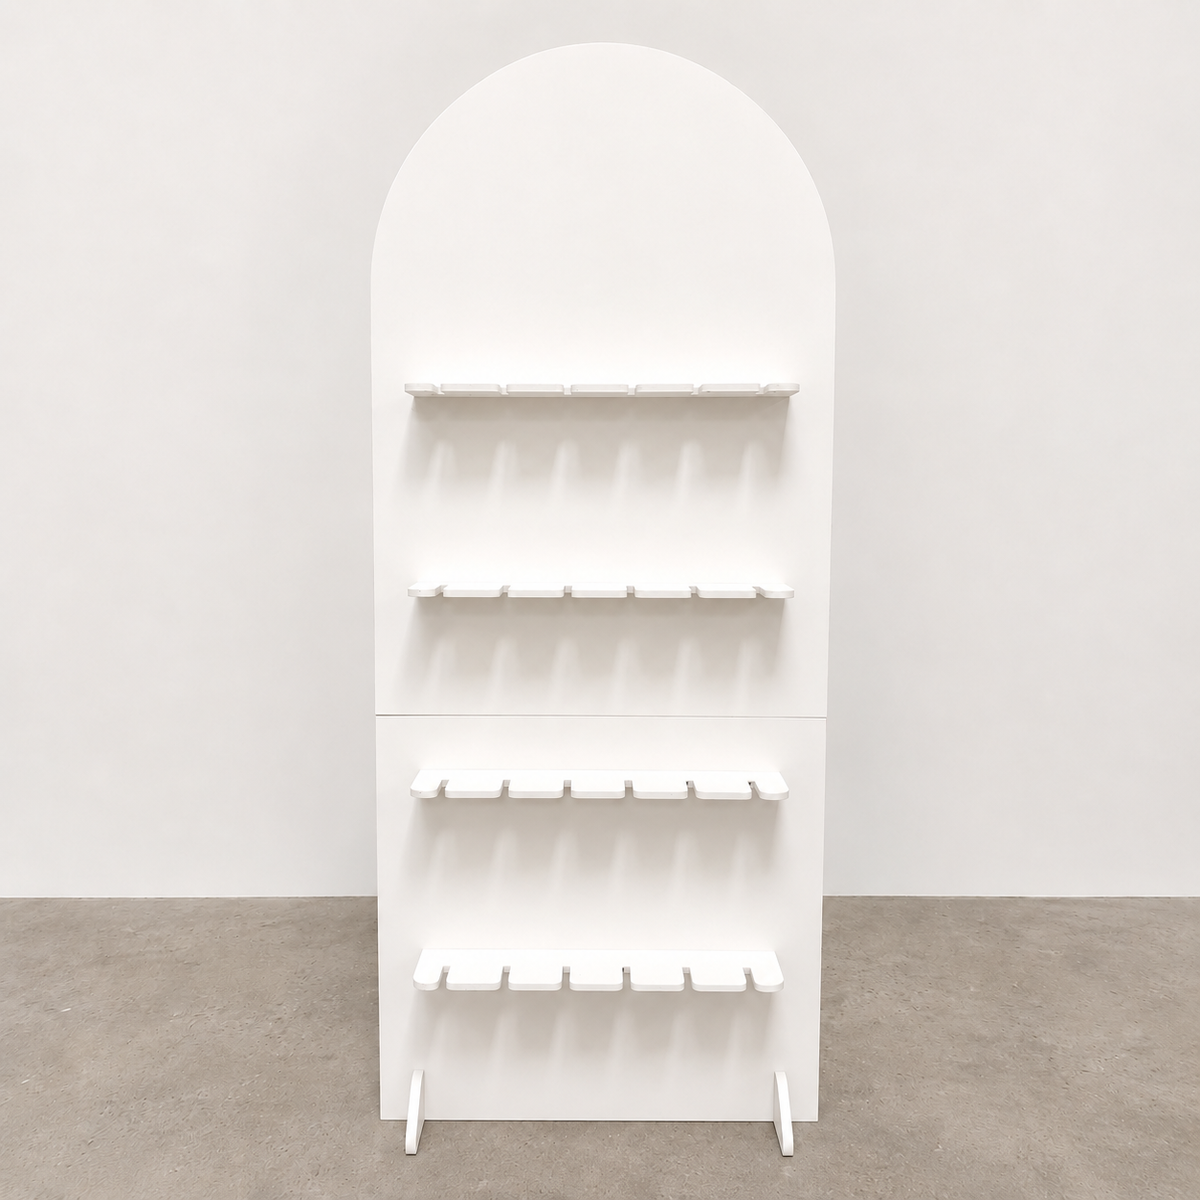
Create an unforgettable first impression with our handcrafted 6 ft Wooden Champagne Wall, the perfect statement piece for weddings, bridal showers, engagement parties, baby showers, corporate events, and celebrations of every kind. Designed to serve guests in style, this elegant display combines timeless craftsmanship with a clean, modern look that complements virtually any event décor.

Crafted from durable wood and professionally finished in crisp white, this champagne wall holds up to 24 champagne flutes across 4 rows, with 6 glasses per row, making it both beautiful and functional for cocktail hour or welcome drinks.

Personalize Your Champagne Wall

Make your display uniquely yours with our optional custom wooden lettering.

Your custom design is:

  • Precision cut from wood
  • Finished in matte black
  • Mounted directly onto the front of the wall for a premium raised 3D appearance

The customizable header area measures 15" W × 30" H, providing plenty of space for one of our featured designs.

Product Features

  • Handcrafted from sturdy wood
  • Painted white with a smooth finish
  • Holds 24 champagne flutes (glasses not included)
  • 4 display rows with 6 glass holders per row
  • Overall dimensions:
    • Height: 72" (6 ft)
    • Width: 30"
  • Optional custom 3D wooden lettering in matte black
  • Elegant design for weddings, parties, showers, and special events

Assembly Required

For easier shipping and storage, the champagne wall comes disassembled in multiple pieces.

Assembly includes:

  • Connecting the two wall sections together
  • Attaching and assembling the support stand

All necessary hardware is included, and assembly is straightforward.

Champagne Wall — Assembly Instructions

In the box

  • Arched top panel

  • Rectangular bottom panel

  • 4 shelves

  • 2 support legs

  • 1 base rail

  • 4 small T tabs

  • 3 long T tabs

  • No tools or hardware required

Before you start: Lay a blanket or towel on the floor to protect the panel faces. Assembly takes about 10 minutes. A second set of hands helps with the final step.

A note on terms: Each shelf has notches that pass through the panel and stick out the back. Each notch has an opening in it. The T tabs drop through those openings to lock everything together.

  1. Lay out the panels. Place both panels face-down on your protected surface, straight edges butted together so they sit in their finished order — arched panel on top, rectangular panel below. Shelves are numbered 1 (top) through 4 (bottom).

  2. Install the 4 shelves. From the front of the panel, slide each shelf into its row of slots until the notches pass all the way through to the back. Push until the shelf sits flat and level against the panel face with no gap behind it. Shelves 1 and 2 go in the top panel, shelves 3 and 4 in the bottom.

  3. Lock shelf 1. Drop a small T tab down through each of the 3 notch openings on the back of the top shelf.

  4. Lock shelf 4. Drop one small T tab through the center notch opening on the bottom shelf. The two outer notches stay empty — the support legs lock those in step 6.

  5. Join the panels. Slide the 3 long T tabs down through the notch openings on shelf 2 and continue down into the matching notches on shelf 3. Each long tab spans the seam, so this locks shelves 2 and 3 and joins the top panel to the bottom panel in one move.

  6. Stand it up and add the legs. With a helper, lift the wall upright. Hook one support leg onto each side by dropping its slots over the outer notches on shelves 3 and 4.

  7. Finish the base. Slot the base rail between the two legs. Rock the wall gently to confirm all base points sit flat on the floor.

  8. Load your glasses. Fill the bottom row first and work upward, seating each flute stem fully into its cutout. Holds up to 24 standard flutes.


Care & safety

  • Indoor use, or fully sheltered outdoor spaces only — wind can tip the panel.

  • Load evenly across each row and don't exceed the glass count above.

  • Keep the panel dry; wipe with a soft dry cloth.

  • To disassemble, remove glasses, lay the wall down, and reverse the steps.


View full details